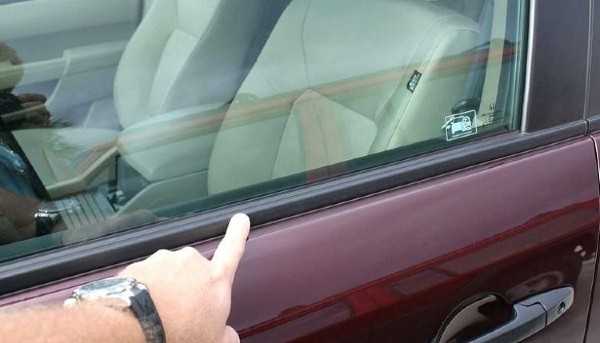
Have you ever thought about what purpose does that black rubber trim that goes around the vehicle windows serve? I bet you must have, but did you ever clean it before! While
cleaning a car , folks often overlook the car’s rubber trims because they are not very aesthetic and don’t contribute to the beauty of the vehicle. However, they are very important and prevent dust and dirt from entering inside the cabin. Rubber seals don’t need a hell of a lot of cleaning, but they deserve your attention once or twice every month, especially in harsh weather as the rubber gets hard.

This post rounds up the quickest and easiest ways to clean the rubber trim around the car windows.
Here`s how to do it, the right way!
What If You Don`t Clean the Rubber Trim?
Rubber seals are really essential for your car due to the two purposes they serve. First, these seals act as a barrier against dust, dirt and other contaminants. Second, if you do not clean them frequently, moisture may enter the cabin.
While dust is cleanable, moisture can wreak havoc because it can damage electronics. Furthermore, the moisture seeping through the damaged window trims fogs up the windows, and you might have to defrost the windshield over and over, which can be problematic.
Rubber window trims are highly durable, but not cleaning them limits their lifespan. So, it`s indispensable to clean them properly and timely.
Step-by-Step Process to Clean the Rubber Trim
Cleaning the rubber seal is way easier and quicker than you think, and it only takes around 10-15 minutes.
Before I explain the steps, here are some important things you need for efficient cleaning:
- A soft-bristled brush
- Rubber trim protectant
- Microfiber cloths
- High-quality automotive shampoo
- Water
Step 1: Clean the Dust and Debris from Around the Window Seals
Roll up the car windows, and start cleaning the dust/debris using a soft-bristled brush. Also, use a microfiber cloth and ensure cleaning the rubber trim thoroughly.
If there are any stains or something is sticking to the rubber, dab it with a wet cloth, and then clean gently.
Step 2: Apply Automotive Shampoo
Applying the shampoo is an essential step to cleaning the rubber window seals. Take some shampoo on a soft-bristled brush and apply it to the rubber.
You can apply the shampoo directly to the trims and then scrub it with the brush. Cover every corner, and use a good amount of shampoo for thorough cleaning.
Step 3: Rinse off the Shampoo
Take some water in a plastic mug, and rinse the rubber trim. Next, use your hand to rub the seals and remove the shampoo. You can even use a damp microfiber towel to wipe off the remaining shampoo.
Inspect the rubber trim, and make sure there are no residues left before you clean and apply the trim protectant solution.
Let the rubber dry for some time, and wipe it with a dry microfiber cloth again before proceeding with step 4.
Step 4: Apply the Trim Protectant Solution
The trim protectant safeguards the rubber from UV rays and other harsh elements of weather, so you should use a popular solution to enhance the life of the black rubber seals.
Spray the solution on the rubber while protecting the glass and car`s paint using a cloth. Do this for all windows, and let the solution dry properly.
Some manufacturers offer a liquid trim protectant, so read the directions carefully before using the product.
Always wear safety goggles and gloves when using these chemicals to stay protected from allergies and irritations.
Tips to Maintain the Car`s Window Trim Safe
Merely, cleaning is not enough to prolong the life of the trim, so here are a handful of tips you should know.
Park Under Shade
The trim deteriorates quickly when exposed to direct sunlight, as UV rays can harm materials like rubber. Parking your car in the garage will help protect the rubber from sunlight.
If you don`t have a garage, buy a good automotive cover, and use it for added protection.
Replace the Damaged Seal Right Away
If you see big cracks on the window seal, get it replaced immediately. Or opt for remedial methods like DIY repair kits to fix the issue quickly.
Use Good-Quality Seals
If you are getting the seal replaced, invest in a premium one that comes with a warranty. Also, get it installed from a reliable mechanic, or contact your car dealership for assistance.
Takeaway!
Now that you know how to clean rubber trim around the car windows, it’s time to plunge into action! But how frequently you should clean the rubber seals, is still a question! Well, it depends on where you live!
If you live in cities with the most extreme weather, you should clean the seals twice a month. Otherwise, you can clean it once every month.
Make a cleaning kit with all essentials packed inside it, and follow this rubber trim cleaning routine to protect your ride from dust, moisture, and corrosion.

